

Ads by Google


Input | HDMI(model-1) | 4 HDMI | ||
SDI(model-2) | 4 SDI,BNC port | |||
Output | ASI | 2 ASI/TS BNC interface;MPTS | ||
IP-MPTS(Model-3) | TS over IP/UDP;unicast/multicast;IP-headend | |||
IP-SPTS(Model-4) | TS over IP/UDP;multicast;IPTV | |||
Video | Encoding | MPEG-4 AVC/H.264 High Profile Level 4.0 video codec format Advanced video pretreatment algorithm | ||
Rate Control | CBR/VBR | |||
GOP Structure | IBBP | |||
HDMI(model-1) | FULL HD(1920*1080i*60/50/59.94, 1280*720p*60/50/59.94) | |||
SDI(model-2) | FULL HD(1920*1080i*60/50/59.94, 1280*720p*60/50/59.94) SD(720*576,720*480,only SDI input) | |||
Output bitrate | 1 to 20Mbps(4:2:0 Encoding) per channel | |||
Control | NMS(Ethernet/IP Port), keypad + LCD | |||
NMS+LCD:Real-time effective output bitrate monitoring | ||||
Audio | Bitrate | 128,160,192,224,256,320,384Kbps | ||
property | MPEG-1 Layer2 audio | |||
Sample bitrate | 48k | |||
Features | Size | 44mm*482mm*410mm(1RU) | ||
Environment | 0 ~ 45(Operating);-20 ~ 80(Storage) | |||
Power | 100-240VAC±10%,50Hz,25W | |||
Specification1 HD 4in1 HDMI/SDI H.264 Encoder(SC1115,SC1125,SC1135,SC1145) 12 Network Management 32.1 Encoder Setting 32.2 NMS software Manual 4
Please add my [Skype],MSN,Yahoo to get more information of products.Mine is [benter.niu].
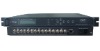
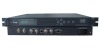
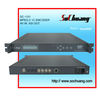
1 HD 4in1 HDMI/SDI H.264 Encoder(SC1115,SC1125,SC1135,SC1145)Overview:Model-1(4HDMI input):SC1115,SC1125;Model-2(4SDI input):SC1135,SC1145;Model-3(MPTS):SC1115,SC1135;Model-4(SPTS/IPTV):SC1125,SC1145;
MPEG-4 AVC/H.264/part-10 high definition (HD) encoder is a user-friendly, powerful encoder with multi-service capability, flexibly delivering multiple full and low resolution services to a range of devices. It supports multiple HD formats including 1080i/p, 720p. Besides it support TS (UDP) over IP output, combined with 4 HDMI or SDI inputs. Definitely, it conforms to the H.264 standard from the ITU.Technical Specification:
2 Network Management2.1 Encoder Setting P1: Output setting P2: Video/Audio setting P3:IP Out setting
2.2 NMS software Manual1. INTRODUCTIONConfiguration and monitoring of parameters can be done by network management software( ) with computer, besides the way by front panel and LCD display of the device.1.1 Network Management Software for EquipmentsNO. Equipment Name Basic Function 1 Scrambler Program parsing; 4-channel CA simulcrypt; AC setting; ECMG/EMMG condition monitoring 2 Single-out TS Multiplexer Program parsing and multiplexing by 8 channels; program attribute modifying; NIT editing; PSI editing; PID transparent transmission; PID filtering; real time monitoring. 3 2-out TS Multiplexer Program parsing and multiplexing by 8 channels; program attribute modifying; NIT editing; PID transparent transmission; PID filtering; real time monitoring. 4 MPEG-2 Single Channel Encoder Video parameters; audio parameters; program attribute. 5 MPEG-2 Single Channel IP Encoder Video parameters; audio parameters; program attribute; IP output. 6 MPEG-2 4-in-1 Encoder Output parameters; Video parameters; audio parameters; program attribute; condition monitoring. 7 MPEG-2 5-in-1 Encoder Output parameters; Video parameters; audio parameters; program attribute; Program parsing and multiplexing; condition monitoring. 8 SD H.264 IP encoder 9 HD H.264 IP encoder 10 SD 4in1 H.264 IP encoder 11 4-Channel Satellite Receiver(DVB-S/S2) 4-channel satellite parameters; signal monitoring. 12 7-in-1 Satellite Receiver(DVB-S/S2) Program parsing and multiplexing by 7 channels; program attribute modifying; NIT editing; PID passthrough; PID filtering; real time monitoring; 6-channel satellite parameters; satellite signal monitoring; multiplexed output monitoring. 13 QAM Modulator QAM parameters; PSI/SI insertion; NIT editing; PID passthrough (the second ASI stream); PID filtering; PSI editing; multiplexed output monitoring. 14 QPSK Modulator QPSK parameters. 15 DTMB-T Modulator DTMB-T parameters. 16 DS3-ASI Adapter ASI to DS3;DS3 to ASI; 17 IP-ASI Adapter IP output parameters; IP input parameters; data port parameters. 1.2 Network ProtocolTCP/IP/UDP1.3 Working EnvironmentsOperation system: Windows series.2.NETWORK MANAGEMENT SYSTEM(NMS)OPERATION GUIDE2.1 NMS Login Both defaulted user name and password are ‘admin’. You can modify them through’setting’->‘user configuration’.“Version:3.18”:NMS sorfware version number. Enter user name and password, click ‘OK’ to login NMS software. As following diagram: MenuToolbar: open and save of NMS software configuration.Adding node and device. Device basic operating(Save,restore,reload).Read and write configuration of device.Device listDevice connection information.Device parameter operation zone. Alarm area. “Open device” and “Save device”: open saved configuration, save current configuration. While NMS’s configuration file and NMS are under the same directory, these two functions perform automatically when open or close the software. Following is introduction of the 9 areas above:
2.2 Add Freq Node and Devices “Add Freq Node”: all devices can be divided and managed according to frequency node. Click ‘Add Freq Node’, a dialogue box pops, enter a freq node, e.g.: 385MHZ . “Add Device”: add a device to corresponding frequency node. Choose the right frequency node, click ‘add device’ and a dialogue box pops: Add Scrambler Add”7 in 1 Satellite Receiver”Select device type as “ 7-in-1 satellite receiver”; set the device name according to requirement; you will need to fill in ‘IP Address’ & ‘destination port’ with the device’s IP address and network management port. You can view the IP address by pressing ‘down’ on the front panel, or go to ‘network setting’ under ‘menu’. Below are some default IP address and default port for commonly used devices:Encoder: 192.168.0.110:2009MPEG-2 4 in 1 Encoder: 192.168.0.210:2009 H.264 4 in 1 Encoder: 192.168.0.219:2009HD H.264 IP encoder: 192.168.0.119:2009
TS Multiplexer: 192.168.0.120:20092-out TS Multiplexer: 192.168.0.210:20097-in-1 Satellite Receiver: 192.168.0.020:2009
Scrambler: 192.168.0.130:2009DVB-Satellite Receiver (4-channel): 192.168.0.050:2009 IRD with CAM: 192.168.0.059:2009
QAM Modulator: 192.168.0.040:2009DTMB-T Modulator: 192.168.0.040:2009QPSK Modulator: 192.168.0.140:2009
DS3 Adaptor: 192.168.0.150:2009TS-IP Gateway: 192.168.0.254:2009
“Edit Device”: You can edit the linking info. of the selected device.If the device is not connected successfully, it will display as below: ( ):The things now you need to do:1. Check if the linking info of the device is correct. The list box is as below: If there is any incorrect parameter, you can lick ‘edit device’ after selecting the device. Reconfirm after parameter modified.
2. Check if there is IP clash. If yes please turn off the device, type ‘cme.exe’ in ‘run’ under windows. e.g.: After confirmation: Type ‘arp –d’ command,clear the old arp info: Type PING command: If ‘192.168.0.20’ passed, it shows there is ‘192.168.0.20’ equipment in network. Now you can modify this equipment’s IP address, or edit the IP address of our device (IP address editing please see ‘front panel operation guide’). After trouble eliminated, the device name in the device list will show as below: ( ): In the device list box, you can view the device information (e.g.: hardware version, software version) by clicking the device name. The box in right side is for parameter operation. “Del Device”: Delete a device from the device list box.
2.3 View Device Configuration As screenshots above show,click a connected device in device list box, and device operation box and parameters are shown in the right side box. If the device is not connected, there will be no parameter in operating box. Notice:Start and connect a device AFTER selecting this device in the NMS, it will display as below: It is recommended to refresh the inputs first, then commit after parameter modification. 2.4 Save & Back up Configuration The five buttons are effective only when an online device is selected. Here are two conditions for example: Now all the five buttons are effective. Any operation to QAM modulator is of no effect because it’s not online.
‘Save Config’: After commit or confirm set configuration, click this button to give a order to the device to save all configuration into ‘FLASH’ (storage); you will need to wait a few seconds. ‘Restore Factory’: Give a order to the device to renew and start using the configuration. You can read the renewed configuration by clicking ‘refresh’ or ‘parse’ on operation interface. Please click ‘Save Config’ if it needs to be saved. ‘Reload Config’: reload and use the configuration saved in FLASH. This function is usually used after ‘import config’, and the new configuration is effective without restarting the device. ‘Export Config’: Fetch the device’s configuration to local disk (computer). You can import this configuration when it needs to renew the configuration or to use a back-up device in future. ‘Import Config’: import configuration of ‘export config’ into FLASH; the imported config can be used after ‘reload config’ or restart the device.